|
How to Build a Computer
The first step in building a computer is deciding what type of machine you want to build. Do
you want a really inexpensive computer for the kids to use? A small, quiet machine to use as a media computer in the living
room? A high-end gaming computer? Or maybe you need a powerful machine with a lot of disk space for video editing. The possibilities are endless, and the type of machine you want to build will control many of the decisions you make down
the line. Therefore, it is important to know exactly what you want the machine to accomplish from the start.
Let's imagine that you want to build a powerful video editing computer. You want it to have a dual-core CPU, lots of RAM and a terabyte of disk space. You also want to have FireWire connectors on the motherboard. These requirements are going to cause you to look for a motherboard that supports:
- Dual-core CPUs (either Intel or AMD)
- At least 4GB of high-speed RAM
- Four (or more) SATA hard drives
- FireWire connections (possibly in both the front and back of the case)
Then it all needs to go in a case with enough space to hold multiple hard disks and enough air flow to keep everything
cool.
With any computer you build, knowing the type of machine you want to create can really help with decision-making.
Choosing a Motherboard
Choosing a motherboard is the most interesting part of any building project. The reason it is so interesting is because
there are hundreds of motherboards to choose from and each has its own advantages and disadvantages.
One easy way to think about motherboards is to break them up into a few categories. For example:
- Cheap motherboards: Generally in the $50 range, these are motherboards for older CPUs. They are great
for building inexpensive machines.
- Middle-of-the-road motherboards: Ranging in price from $50 to $100, these are one step up from the cheap
motherboards. In many cases you can find motherboard and CPU combos in this price range, which is another great way to build
a cheap machine or an inexpensive home/office computer.
- High-end motherboards: If you are building a powerful gaming machine or video workstation, these motherboards
give you the speed you need. They range in price from $100 to $200. They handle the latest CPU chips at their highest speeds.
- Extreme motherboards: Falling into the over-$200 range, these motherboards have special features that
boost the price. For example, they might have multiple CPU sockets, extra memory slots or special cooling features.
Buying Computer Parts
Once you have chosen your motherboard, you are ready to choose everything else. Here's what you need to get:
- The CPU that's the right brand and the right pin configuration to fit your motherboard. Pick whichever CPU clock speed
fits your budget and intentions. (If you purchase a motherboard/CPU combo, you can skip this step.)
- The RAM with the correct pin configuration that will match your motherboard. If your motherboard is using a specialty RAM configuration
(normally to improve performance), make sure the RAM you buy matches its requirements.
- If the case does not come with a power supply, you'll need to choose one. Make sure its connectors match the motherboard. Three hundred watts are enough for most machines,
but if you are building a gaming machine with multiple video cards or a machine with lots of disks, you may want to consider
something bigger.
- Choose a video card if you are not using the onboard video on the motherboard. Make sure the card's connector is appropriate
for the motherboard (AGP or PCI Express).

A basic AGP-based graphics card
|
Choose an optical drive. If you are building a cheap machine, get the cheapest CD-ROM drive you can find. If you want
to burn DVDs and CDs, make sure the drive can handle it.
Choose a hard disk, making sure that it matches the PATA/SATA status of your motherboard.
Choose an operating system: Windows XP (which comes in home, professional and media center editions) or Linux in its hundreds of different forms.
Buying
Now that you have picked everything out, it is time to purchase your parts. You have three
options:
- Mail order on the Internet - All kinds of stores sell computer parts on the Web. Visit a place like HowStuffWorks Shopper to compare prices. Don't forget about eBay.
- A big national chain - Places like Tiger Direct, Fry's, and CompUSA have stores in most large cities
that will sell you parts. They also have people on staff who may be able to answer questions.
- local parts retailer - Any big city will have a number of smaller, local shops selling parts. Look in
the Yellow Pages or online. I live in Raleigh, N.C., and a typical shop of this genre in Raleigh is called Intrex. The people working at a shop like this can often answer lots of questions, and they may also be willing to help you if your
machine does not work after you assemble it.
Installing RAM and the Microprocessor
But before we start building, we need to say one thing about static electricity. Most of the parts you
will be handling when you assemble your computer are highly sensitive to static shocks. What that means is that if you build
up static electricity on your body and a shock passes from your body to something like a CPU chip, that CPU chip is dead.
You will have to buy another one.
The way you eliminate static electricity is by grounding yourself. There are lots of ways to ground yourself,
but probably the easiest is to wear a grounding bracelet on your wrist. Then you connect the bracelet to something grounded
(like a copper pipe or the center screw on a wall outlet's face plate). By connecting yourself to ground, you eliminate the
possibility of static shock.
Each combination of parts is unique. But in general, here are the basic steps you will need to follow when you assemble
your machine:
First, you'll need to unwrap the motherboard and the microprocessor chip. The chip will
have one marked corner that aligns with another marked corner of its socket on the motherboard. Align the corners and drop
the microprocessor into the socket. You don't need to apply any pressure - if it's aligned correctly, it should fall into
place. Once you have it in, cinch it down with the lever arm.
Now, you need to install the heat sink. The CPU box will contain a manual that tells you how to do it. The heat sink will
contain either a heat sink sticker or heat sink grease to use when mounting the heat sink on the CPU. Follow the instructions
closely to install it. To install our heat sink, all we had to do was put it in place, cinch it down with flanges on either
side and lock it with a cam. Connect the power lead for the heat sink to the motherboard.
Next, you'll install the RAM. Look on the motherboard for the slot marked "one" and firmly press the RAM module into it.
It will probably take more pressure than you'd think to get the RAM into place. Each side of the module should also have a
rotating arm that will lock the RAM down.
Now your motherboard is ready to put in the case.
Assembling the Case
Next,
you'll assemble the case. You'll need to install the power supply, the motherboard, a faceplate and standoffs to hold the
motherboard in place. You'll also need to connect some wires to the motherboard.
Your motherboard should have come with a face plate for its back connectors. The case already has a hole cut in it for
the plate, so you just need to put in the plate and press it until it clicks into place. Now you can put in in the motherboard.
It needs to sit about a quarter of an inch away from the case's surface so that none of its connectors touch the case. You'll
accomplish this by placing spacers, which are also included with the motherboard.
Because each motherboard is different, you'll have to set it into the case first to see which screw holes on the motherboard
match up with the pre-drilled holes in the case. Then you can take the motherboard back out, place the spacers, and put the
motherboard in on top of them. Make sure that the motherboard lines up with the faceplate and the holes line up with the spacers.
Find the screws that fit (these should have come with the case) the spacers and screw down the motherboard. Don't screw
them in too tightly -- they just need to be in snugly. Be very careful when putting in the screws. If you drop them into the
case, they could damage the fine wires on the motherboard.

Installing the power supply.
|
Now you can install the power supply in the case if it's not already installed. The power supply has two sides. The fan
side faces outside the case and the wire side faces inside. Slide the power supply onto its brackets and secure it with screws
(the case or the power supply should have come with them).
Connect the power leads to the motherboard. There should be a large one and a small one, and it will be obvious as to where
each one goes.
You'll be left with about 15 more wires. Don't worry -- the manual has a page to tell you exactly where each one goes.
Each of them has a label that corresponds to a label on the correct port.
Installing the Hard Drive
The
last steps are installing the hard drive and the CD-ROM drive. The case has a removable bracket with four rubber grommets
on it, which line up with four holes on the hard drive. It also came with four screws made just to punch through those grommets.
Screw the hard drive into the bracket, then put the bracket back into its slot in the case. If you are using IDE/PATA drives,
be sure to set the jumpers correctly. Then connect the hard disk to the power using one of the connectors coming off of the
power supply. If it fits, then it's a match.
Now install the cables. One side of the cable has a red stripe on it, which makes it " pin 1." Look on the motherboard
and hook the cable into the IDE connector marked "1." Insert the other end of the cable on the back of the drive. Now the drive is ready to go.
Install the CD-ROM drive next. Again, set the jumpers correctly. The drive fits in the front of the case, and you may have
to pop out a faceplate to make room for it. Slide it in and screw it into place, making sure that it's aligned with the front
of the case. Just as with the hard drive, you can use any available connector from the power supply. You'll also use the cable
that came with the CD-ROM drive to connect it to the motherboard (align the red stripe for "pin 1") and plug the other end
into the drive. Connect the audio for the CD drive. Again, there's an obvious place for it to plug in on the motherboard and
on the drive itself.

Placing the hard drive into its bracket.
|
If you're using a video card, now you'll install it as well. Our motherboard has an AGP video slot so we have an AGP video
card. The motherboard only has one video card slot, so you should be able to find it easily (you can also use the manual).
Line up the card with the slot and push it into place. If the video card has its own power connector, connect it to the power
supply. If the case has extra fans, make sure they have power too.
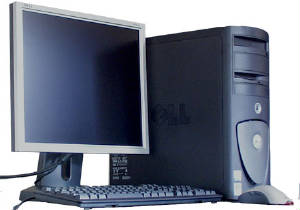
Now you can close up the case and add a monitor, keyboard, mouse and speakers. In the next section, we'll cover what to
do after powering up the computer and what steps to follow if it doesn't work.
Powering Up and Troubleshooting
Now, the moment of truth -- it's time to turn your machine on and see if it works. If there's a switch on the back of the
power supply, make sure it is on. Also make sure that the power supply is set correctly to 110 or 220 volts (some power supplies
do this automatically, others have a switch or a slider).
Then push the power switch on the front of the case. In the ideal case, four things will happen:
- You will see/hear the fans spin up
- You will hear the hard disk spin up.
- Lights will light on the case.
- You will see something happening on the monitor to indicate that the motherboard is alive.
If you see/hear all of that happening, you are successful. You have created a working machine. Using the manual that came
with the motherboard you can enter the BIOS screens and make sure everything looks OK. Chances are you will need to set the
machine's date/time, but that is probably all you have to do. Everything else is probably automatic. All the drives will be
recognized and auto-configured. The default settings on the motherboard will be fine.
The next step is to install the operating system. And presto, you have a working machine of your own creation. Congratulations!
Troubleshooting
What if you put it all together and it doesn't work? This is the one possible downside
of building your own machine. It is hard to describe the feeling you get when you try turning on the machine and nothing happens.
You have put in several hours of work and a significant amount of cash, so it's discouraging to get no response.
All is not lost, however. Here are several items to check:
- Is the power supply firmly plugged in and turned on (many power supplies have a small switch on the back)? Try a different
outlet.
- Did you plug the power supply into the motherboard? Look at the manual for details.

Make sure that your motherboard is connected
to the
power supply.
|
- Is the case's power switch properly connected to the motherboard? If you have plugged the switch into the wrong pins on
the motherboard, it will not work. Check the motherboard manual.
- Are the drives connected to the motherboard properly? Do they have power?
- Unseat and reseat the video card. If the motherboard has onboard video, try to remove the video card completely and boot
using the onboard version.
If you have checked all of that and nothing continues to happen, it could mean:
- The power supply is bad
- The switch on the case doesn't work. We actually had this happen once on a machine we built at HowStuffWorks.
- Something is wrong with the motherboard or the CPU.
The easiest way to determine where the problem lies is to swap parts. Try a different power supply. Swap a different motherboard
into the case. Play around with different combinations.
If it is still not working, then you have a few options at this point. You can go back to the shop that sold you the parts.
If you bought them from a small local shop, they can help you debug the problem (although it may cost you). If they sold you
a bad motherboard (rare, but possible) they will usually help you out. You can also try to find a more experienced builder
who would be willing to help you. There is a rational cause for the problem you are experiencing -- either a bad part or a
bad connection somewhere -- and you will find it.
Now that you've seen how simple it is to build your own computer, we hope that you'll give it a shot. You'll have a computer
that you understand completely and will be easy to upgrade. You can save money, and it's a lot of fun too. So the next time
you need a new computer, consider building it yourself!
Lots More Information
Related HowStuffWorks Articles
|